Using Patients - Patients Tab
{{#customtitle:Using Patients - Patients Tab|My Title}}
Patients Tab
Adding a New Patient Record

- Start by entering the patient’s Surname, First Names and Title. The Initial and Salutation boxes will auto-complete based on the details previously entered.
- Enter the address details for the patient. If you have the postcode facility then you can enter the patients Postcode and then click the
 to automatically fill in the address details.
- The NHS Number and National Insurance Number fields are not required fields but, obviously, provide useful information.
- When you enter the patient’s Date of Birth you will see that Optisoft Enterprise automatically calculates the patient’s current age.
- Select the appropriate radio button for Private/NHS and patient Gender.
- The OO, DO and GP fields can only be filled in if you have previously entered Staff and GP details into the system.
- Enter the patient’s contact numbers into the appropriate field. The mobile telephone number, which can be used with the Optisoft Email SMS module, has a format check. This is to ensure the validity of the information you are entering. You should notice that the text will stay red until you have entered an acceptable format of data.
- Enter the patient’s email address into the appropriate field if they have one. This address, which can also be used with the Optisoft Email SMS module, also has a format check as described above.
- You can enter a patient Reference in the field provided. You can also set the system to automatically assign a reference number, or choose not to use reference numbers at all in the Patient Module Maintenance.
- You can add a patient’s photo to their record, either by using a webcam or by importing an image from a file.
- You can assign pre-set Lifestyle Codes to a patient’s record. These can be patient history information, i.e. Glaucoma, Diabetic etc, marketing information, i.e. spending habits, hobbies, profession, or any other information that may be of use.
- The patient’s last prescription is displayed at the bottom of the Patient tab. See Rx: Adding/Amending for more information.
- The Last Visit field is automatically updated by the Appointments module when the patient’s appointment has been attended. If you do not have the Appointments module this date will be taken from their most recent Rx.
- The Next Visit field is automatically updated by the Recall module. Based on your Recall Categories it will display the next point at which you have chosen to remind the patient. So for example, if the patient has been sent their first recall letter and has not responded, this field will display the date at which their second recall letter is due to be sent. Alternatively, you can set this field to show you only the first time you contacted the patient, giving you a point of reference as to when they should have had their next Appointment. There is a setting available in the Patient Settings that allows this.
Family Members
If the patient that you are creating is a family member of an existing patient you can save time entering details by using the Family button.

Ensure that you have the patient whose relation you are entering selected, and then click on the Family button. This will create a new patient record but will automatically insert the Surname, address details and home telephone number from the related record. You can then simply fill in the remaining fields and save the record.
Patient’s Prescription
The patient’s last prescription is displayed at the bottom of the Patient tab in the Patient Record module. Optisoft Enterprise retains all of the patient’s previous prescription details for future reference.

Adding a New Prescription
New patient prescriptions can be either entered manually or can be imported automatically from the OptomNotes application.
To manually enter a new prescription you would use the following procedure:
- On the Patient tab within the Patient Record Module click on the
 button to open the prescription screen. You will see that this screen provides more information than the summary on the Patient tab.

- Click on the
 button on the toolbar. If this is the patient’s first prescription this step is not necessary.
 - Optisoft Enterprise automatically selects today’s date for the new prescription. You can select another date by using the dropdown calendar or by simply typing in the desired date into the Date field.
- You can select the name of the optometrist who performed the examination using the O.O. dropdown box.
- Enter a description into the Description field. This will help you identify the prescription in the future.
- Enter the patient’s prescription details into the appropriate fields.
- If the field has a dropdown arrow you can click this to provide you with a list of standard values.
- You can also click into any of the fields and use the cursor (arrow) keys on the keyboard to scroll through a list of suitable values, for example the Sphere field provides a list of measurements at 0.25 intervals.
- You can enter a comment into the Comment field at the bottom of the Rx screen. Anything entered into this field will be saved for use on future prescriptions and will appear on the dropdown list here.
- Clicking on the Transpose button on the toolbar will automatically transpose the prescription details.
- Clicking on the Two Adds button on the toolbar will display the Intermediate Add field if the prescription requires it.
- Clicking on the BOZR/TD button on the toolbar will display the BOZR and TD fields if the prescription requires them.
- Once you have added the prescription to your satisfaction, click the
 button to save and close the prescription.
 - This should return you to the Patient tab in the Patient Records module, and the Rx Summary will have now updated to the latest prescription you have just entered.
Viewing Existing Prescriptions
Optisoft Enterprise retains all of the previously entered prescription details for a patient and they can be viewed through the Prescription screen in the Patient Records module.
To view an existing prescription for the selected patient you would follow the below procedure.
- Click on the button on the Patient tab to open the Prescription screen.
- The Prescription screen will open with the patient’s latest prescription details.
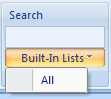
- You can view a list of all previous prescriptions by clicking on the Built-In Lists option underneath the search box and selecting 'All'. You can then select the desired prescription and click OK to view it’s details within the prescription screen.
- Alternately, you can use the search box itself to locate the previous prescription, for example if you enter the date of the previous entry it will locate this for you.
Editing an Existing Prescription
- You can edit an existing prescription in Optisoft Enterprise. This will obviously change the Rx details if saved, so care should be taken to avoid mistakes here.
- To edit the patient’s latest prescription you would simply click on the button to open the Prescription screen. You would then update the prescription here, clicking the Save button to permanently save the changes.
- To edit a previous prescription you would follow the procedure described in Viewing Existing Prescriptions to locate the desired prescription. Then, once the chosen prescription is displayed in the Prescription screen, make the desired changes.
- Again, clicking will permanently save any changes you have made.
Deleting an Existing Prescription
You can permanently delete a prescription from Optisoft Enterprise. This will of course mean, that the prescription information is no longer available on the patient record. The delete function should therefore be used with care.
- To delete a patient’s prescription you would firstly locate the relevant details by following the procedure detailed in Viewing Existing Prescriptions.
- Once the relevant details are displayed within the Prescription screen, click the
 button to delete the prescription from the patient record.
Patient Photo
You can add a patient’s photo to their record so that it displays on the Patient tab. If you have a webcam installed you can capture the image directly by following the procedure below.
- Click on the Capture button, this will attempt to connect to the camera.
- The image window on the Patient tab will display the camera’s image.
- When you are happy with the image, click the
 button again to capture the image.
 - Click Save to save the image to the patient’s record.
If you do not have a webcam you can still attach images to the patient record by following the below procedure.
- First you will need to acquire an image of the patient and save it as a file on your computer.
- Once you have the image saved you can click on the Import button.
- Locate the saved image and click 'Open' to attach it to the patient’s record.
Lifestyle Codes
Lifestyle Codes can be used to add extra information to a patient’s record either for marketing purposes or simply as extra background information relating to the patient. They can be useful for quickly adding medical history data, such as Glaucoma or Diabetes, or patient spending habits or hobbies. Codes assigned to a patient allow you to generate lists of patients who fall into certain groups that can be used as a basis for targeting patients for a mailshot.
Assigning Lifestyle Codes

To add Lifestyle Codes to a patient record, do the following.
- Click on the
 button to open the Lifestyle Codes screen.
 - Select the desired radio button on the left hand side to select the category code.
- Click on the Lifestyle Code you wish to add to the patient record.
- Left click the
 button. You can alternatively double left click on the relevant code.
 - You can repeat this process as many times as necessary.
- Once you have added the desired Lifestyle Codes you must click the
 button to save the details.
Last Seen and Next Visit Dates
At the bottom of the Patients tab are a pair of date boxes, the Last Visit date and the Next Visit date.
Last Visit

The Last Visit field on the Patient tab will display the last time that the selected patient was seen at the practice. This date is reached in different ways depending on the modules that you have installed. If you have the Appointment module installed then the most recent Attended Appointment will be used as the Last Visit date. If you do not have the Appointment module then the Last Visit date will be calculated from the most recent prescription date.
Next Visit

The Next Visit field on the Patient tab will display the next time that the selected patient is due in the practice.
This date is reached in different ways depending on the modules that you have installed.
If you have the Appointment module installed then the next booked appointment date, if applicable, will be used as the Next Visit date.
If you do not have the Appointment module, then the Next Visit date will be calculated from the Recall system.
The Recall system’s Next Letter Date will be displayed as the Next Visit date. If the patient has multiple Recall types then the earliest Next Letter date will be used.
You can limit the Next Visit date to show only the First Band date, the date at which the first Recall letter should be sent, rather than the Next Letter date.
Setting Next Visit Date Band One Only
This setting limits the Next Visit date field on the Patient tab to only use the first band of the patient’s Recall category when calculating the projected next visit. This means that, even if the patient has not visited the practice for some time and has had all Recall letters printed, the Next Visit date will always been shown as the date that the patient should have been seen, based on the Recall Category that they have had assigned.
- Click on the
 in the top left of the screen.
 - Go to Maintain > Patients > Settings.

- Click in the checkbox next to Next Visit Date Band One Only.
- Click on the button to save the changes.