Using the Form Designer - Creating a Ordering/Dispensing/CL Dispensing Template
Jump to navigation
Jump to search
{{#customtitle:Creating an Order/Spectacles Dispensing/Contact Lens Dispensing Template|My Title}} In order to create a new Template you will need to do the following:
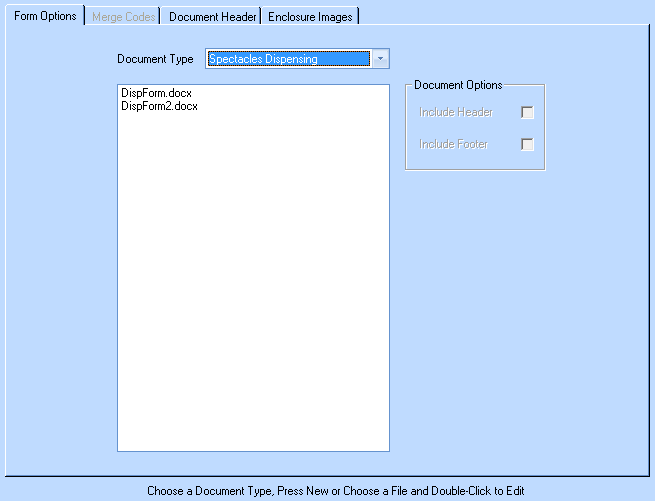
- Make sure the Document Type drop down specifies 'Ordering', 'Spectacles Dispensing or 'Contact Lens Dispensing', which ever option is relevant.
- Your screen should look something similar to this.
- Now click 'New' in the top left of the screen.
- You will be presented with a 'Save As' dialogue screen.
- Give your new Template a File Name and click Save.
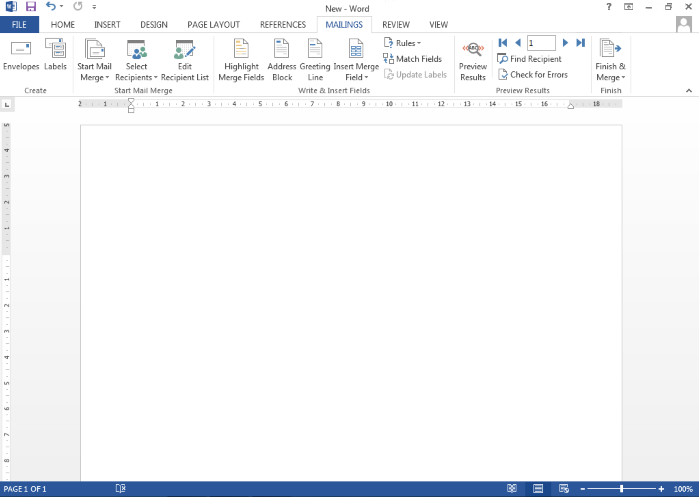
- You will now be presented with a blank Microsoft Word document.
You can now use all the available design tools within Microsoft Word to create your New Template.
As part of creating your new Template you will want information from Optisoft Enterprise to be merged into this document when you print it. To do this you will need to position Merge Codes in the document as described below. Please note the instructions below are for use with Microsoft Word 2013; other versions may differ slightly. If you require help please ring the Optisoft Support Desk.
- If not already there, in the tool-bar in Microsoft Word click Mailings.
- In your document, position the cursor where you would like the new merge code to go.
- Click on Insert Merge Field.
- Click on the desired merge code. This should be added into your document to where ever your cursor was positioned.
- Take care to add in punctuation and grammar in between the merge codes, just as if you were writing a normal letter.
- Repeat as necessary.
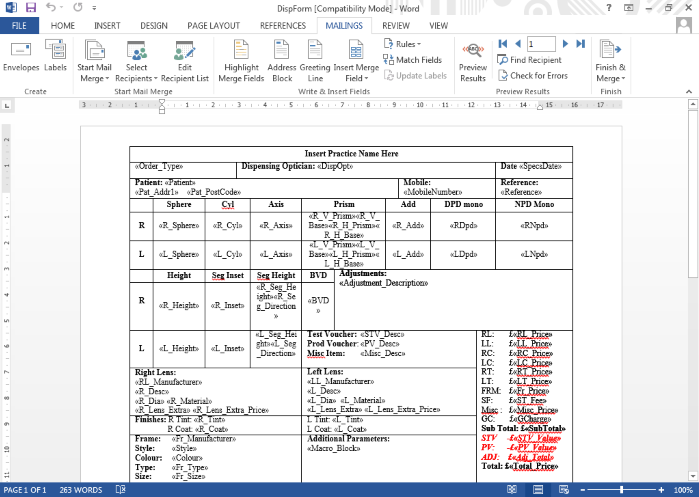
- The end result should look something similar to the image below.