Difference between revisions of "Using the Form Designer - Editing a Standard Letter/Form"
Jump to navigation
Jump to search

(Created page with "Back") |
|||
| (7 intermediate revisions by the same user not shown) | |||
| Line 1: | Line 1: | ||
In order to edit an existing Standard Letter/Form you will need to do the following: | |||
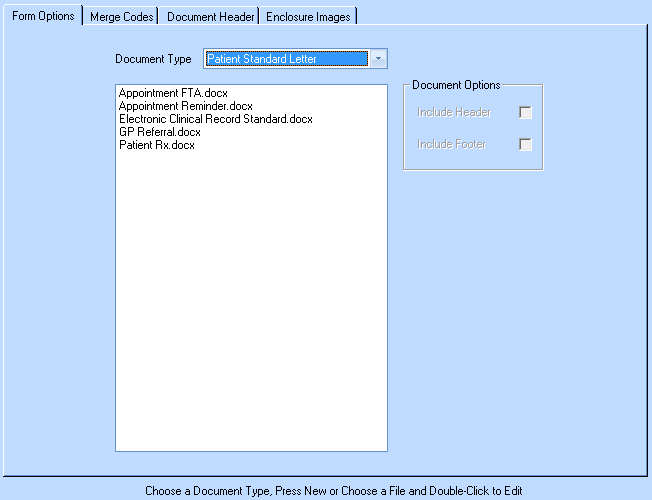
*Make sure the Document Type drop down specifies 'Patient Standard Letter' or 'Patient Standard Form'. | |||
*Your screen should look something similar to this. | |||
<center>http://www.optisoft.co.uk/wiki/images/Optisoft/FormDesigner/FormDesignerStandardLetter.png</center> | |||
*Double Click on the Standard Letter/Form that you wish to edit. | |||
*You will be presented with the Standard Letter/Form you selected in design mode. | |||
You can now use all the available design tools within Microsoft Word to edit your Standard Letter/Form. | |||
To position Merge Codes in the document follow the instructions below. Please note the instructions below are for use with Microsoft Word 2013; other versions may differ slightly. If you require help please ring the Optisoft Support Desk. | |||
*If not already there, in the tool-bar in Microsoft Word click Mailings. | |||
*In your document, position the cursor where you would like the new merge code to go. | |||
*Click on Insert Merge Field. | |||
*Click on the desired merge code. This should be added into your document to where ever your cursor was positioned. | |||
*Take care to add in punctuation and grammar in between the merge codes, just as if you were writing a normal letter. | |||
*Repeat as necessary. | |||
*The end result should look something similar to the image below. | |||
<center>http://www.optisoft.co.uk/wiki/images/Optisoft/FormDesigner/MSWordCompleteStandardLetter.png</center> | |||
==Adding Additional Merge Codes== | |||
*Make sure the Document Type drop down specifies 'Patient Standard Letter' or 'Patient Standard Form'. | |||
*Your screen should look something similar to this. | |||
<center>http://www.optisoft.co.uk/wiki/images/Optisoft/FormDesigner/FormDesignerStandardLetter.png</center> | |||
*Single Click on the document you wish to add merge codes too. | |||
*In the tool bar, click 'Show Codes'. | |||
*This will take you to the 'Merge Codes' tab and display all the merge codes that are currently in the document you had selected. | |||
*To add extra codes simply select the correct table, and double click on all the codes necessary. | |||
*When finished, click on the 'Form Options' tab, and Double Click on your document. | |||
*Click 'Yes' to the 'Do you wish to add the chosen merge codes to this document' prompt. | |||
*This will have now added the merge codes to the available list which can now be added to your document as normal. | |||
[[Form Designer Module|Back]] | [[Form Designer Module|Back]] | ||
Latest revision as of 10:44, 20 February 2017
In order to edit an existing Standard Letter/Form you will need to do the following:
- Make sure the Document Type drop down specifies 'Patient Standard Letter' or 'Patient Standard Form'.
- Your screen should look something similar to this.
- Double Click on the Standard Letter/Form that you wish to edit.
- You will be presented with the Standard Letter/Form you selected in design mode.
You can now use all the available design tools within Microsoft Word to edit your Standard Letter/Form.
To position Merge Codes in the document follow the instructions below. Please note the instructions below are for use with Microsoft Word 2013; other versions may differ slightly. If you require help please ring the Optisoft Support Desk.
- If not already there, in the tool-bar in Microsoft Word click Mailings.
- In your document, position the cursor where you would like the new merge code to go.
- Click on Insert Merge Field.
- Click on the desired merge code. This should be added into your document to where ever your cursor was positioned.
- Take care to add in punctuation and grammar in between the merge codes, just as if you were writing a normal letter.
- Repeat as necessary.
- The end result should look something similar to the image below.
Adding Additional Merge Codes
- Make sure the Document Type drop down specifies 'Patient Standard Letter' or 'Patient Standard Form'.
- Your screen should look something similar to this.
- Single Click on the document you wish to add merge codes too.
- In the tool bar, click 'Show Codes'.
- This will take you to the 'Merge Codes' tab and display all the merge codes that are currently in the document you had selected.
- To add extra codes simply select the correct table, and double click on all the codes necessary.
- When finished, click on the 'Form Options' tab, and Double Click on your document.
- Click 'Yes' to the 'Do you wish to add the chosen merge codes to this document' prompt.
- This will have now added the merge codes to the available list which can now be added to your document as normal.